How are Yandex Mail Service Settings Made ?
In this article, we will discuss in detail how we can organize our Mail services via Yandex.
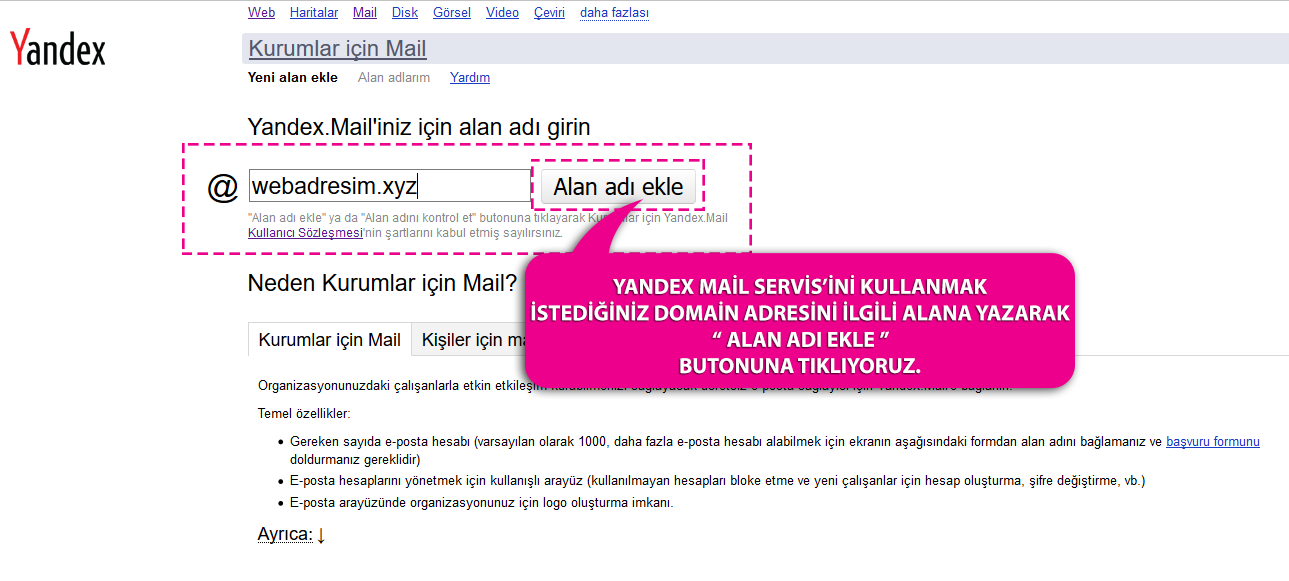
First of all, through any browser ” kurum.yandex.com.tr ” we are logging in to the address. After the user has logged in, the corresponding link on the ” Yandex.Enter a domain name for your mail “ section by entering the domain October you want to use by clicking on the ” Add domain name “ button.

Adding a domain name will be followed by the next step, Yandex will ask you to verify the domain name you added. This process is performed to verify that you are the owner of the domain name that you are processing. There are more than one verification methods in domain name verification processes. It will be enough for you to take action on any of the verification options listed under the Verify that you are the owner of the domain name section. The verification process will take place shortly.

2. as a step, after confirming that you are the owner of the domain name that you want to use, Yandex will ask you to edit your MX records. MX records ;
My Hosting -> Manage -> After logging in to your Control Panel, you can perform editing with the Zone Editor. The MX changes you will make will be fully reflected to the global servers within 2 – 24 hours. After completing the MX change and spreading to global servers, you can perform the operation by clicking on the ” Check MX records “ button for verification.

After the above operations are completed, the ” Verify that you are the owner of the domain name ” and ” Set MX records ” fields will disappear. Instead of the related fields, you will be greeted with the text ” Domain Name Connected ”. After your encounter with the relevant article, the transactions will be completed. You can start adding your email addresses.
 Turkey (Türkçe)
 Worldwide (English)


